How to use the new Social Media Icons
Step-by-step
We all recognise the important role social media platforms play in the life of businesses today. This is why we have released our newest feature for business owners who have a presentation page in the Cylex Business Directory. With the help of our 'Social Media Icons', you can make sure that customers and potential customers get the overall image of your company.
Integrating these icons to your website is not as difficult as it seems. Actually, it is pretty easy and straight-forward. We will walk you through the process step by step.
First, you should sign in to your presentation page by doing the following: click on the 'Sign in' button from the upper right corner of the page, select the business directory sign in and complete the necessary fields (Company ID or Email and Password) to access your dashboard.
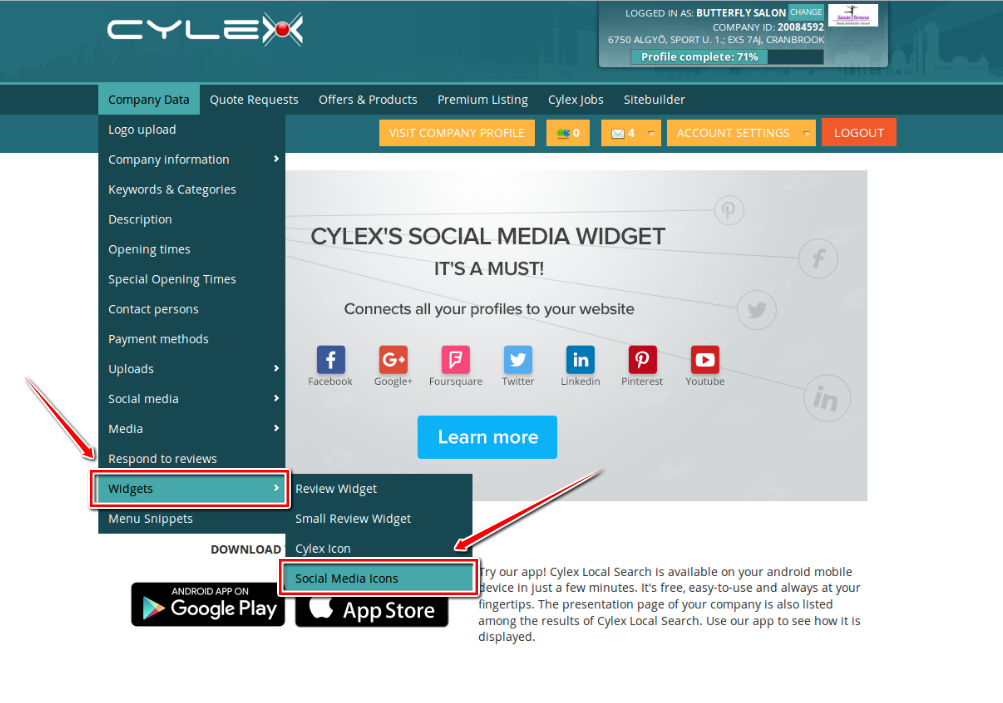
Once you are in, select 'Widgets' then 'Social Media Icons' from the 'Company Data' drop down menu:
In case you haven't added any of your company's social media profiles to your presentation page yet, the 'Social Media Icons' page will look like this, containing only the Cylex icon for the moment:
Otherwise, if you have already added your social media accounts, you will find an icon for each of the completed profiles on the page:
Next, you have to select a size for your icons. Choose between big, medium and small. You will see that when you select a size, the icons will change in the 'Preview' section:
Now let's go to the next step, which is choosing the text colour of the icons. Click on the 'Font colour' tab and choose the most suitable colour for your website from our colour pallet.
If you already know what colour code you want, just insert it in the box next to the 'Font colour' tab.
After you have selected the appropriate size and colour, click on the 'next' button, from the lower-right part, to customise the icons. You can check the 'Icons only' box to display the icons without the names of the social platforms and you can customize the 'Heading' part, if you want to change the “Find us on:” heading to something else. Remember, everything that you try here will be visible in the 'Preview' section, to give you an idea about how these icons will look like on your website.
Now comes one of the most essential parts. Choose which icons to show or hide by checking or unchecking the check-box next to the specific social media platforms:
Then, if you have other profiles that are not completed yet, simply click on the 'Edit' button, under the check-box and next to the platform's name, fill in the necessary information and click on 'OK'.
When you are done, click on the 'next' button to go to the last phase of your work. What you will see here is a code snippet that needs to be integrated into the HTML code of your website. Don't get alarmed, we know that this might seem a little scary, but using it will be easier than you can imagine. You should simply copy the whole code snippet from the box and then go to your website and paste it into the HTML code.
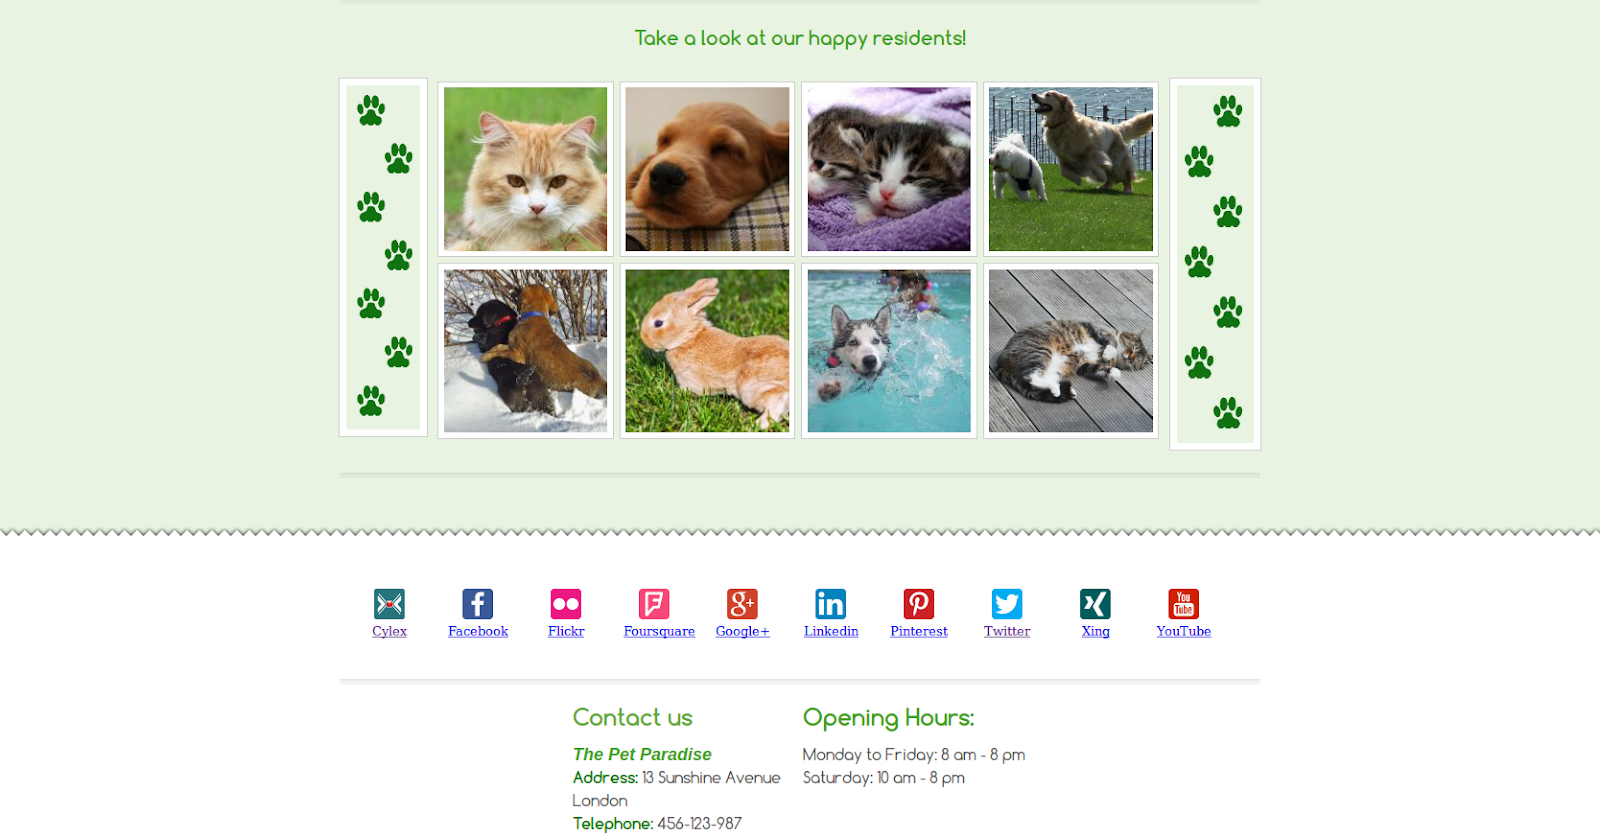
This is it! After you have integrated the code snippet, the icons will be displayed, linking to each one of your profiles, just like it is shown in the picture below. This way your customers will find every important info about your company's social media presence and activity in one place.
If you have experience in using HTML, you are welcome to change the code the way you like it. You can add nofollow links, change the way in which the icons are displayed etc. It is up to you!
Here's just one more thing everyone should know about. Do you have a unique website design with colours that don't go with the colours of the Cylex icon? No worries! We have the solution. Just sign in to your account, go to the 'Widgets' menu item and ask for a personalised Cylex logo.
Our team will create one for you, that is the perfect fit for the design of your website. Of course, all of this is for FREE! So all you have left to do is to sit back and enjoy the perks of having a Cylex presentation page.
When it comes to Google+, you have one more option, that is pretty useful in boosting your SEO efforts. You can add a link from your Google+ page to your Cylex profile by following some simple steps.
Sign in, if you are not already signed in, then click on the ‘About’ tab.
In case you haven’t added any links to your profile yet, click on the ‘+’ sign from the lower left corner of the page, click on ‘Sites’ and add the Cylex profile to the ‘Other profiles’ field.
If you have already completed the ‘Other profiles’ section, then you only have to click on the grey pencil to edit it and add your Cylex profile to the ‘Other profiles’ field.
Choose how you share this information on your Google+ profile. We suggest you make it ‘Public’ to help your customers find you in Google search results more easily.
Using these icons will create bridges between every profile that your company has, so customers can cross from one platform to the other, reaching the most comprehensive picture of your business. Don't miss out on offering them this chance!